#1847
HERE IS A HANDOUT I WROTE ABOUT THE BRUYNZEELS:
(STEP ONE FOR THE COLORING EXAMPLE TO FOLLOW INSTRUCTIONS)
SUPPLIES YOU WILL NEED
· Beckett Expression 80 lb. Card Stock
Iceberg or Candlelight is preferred
· Marvy Matchables Ink (Black is waterproof) or Ancient Page Coal Ink
· Tuff Stuff Eraser Stick (or any white eraser)
· Acrylic Matte Sealer (any brand)
· Dove Blender (or other brand of blender)
· INEXPENSIVE brand of cotton swabs
THE PAPER AND INK
Your paper makes all the difference when using these pencils. Since this is a chalk-based product, blending will be optimized using a smooth, uncoated card stock. Beckett Expression is highly recommended. This smooth, uncoated paper ensures superior results with fine lined stamps, such as House Mouse with lots of detail. Other papers will work, but you will not achieve the same results. Marvy Matchables Black or Ancient Page Coal ink is recommended since they are waterproof when dry. Other waterproof inks may also be used.
APPLYING THE COLOR
These pencils are very richly pigmented; more so than the small chalk squares. The colors are more intense and require extra care when using. The color will stain the paper, so be sure to apply it only where you want it. Hand smudges can often be erased, but usually not the color that has been applied directly to the paper. On scrap paper, practice with each color to see how deep the color values will be when applied. Some of the colors apply lighter and do not blend as far (e.g. 877 Ultramarine), and others are very rich in pigment and blend a lot farther (e.g. 837 Lilac). Many people apply too much color and then are left with excessive amounts chalk on the paper, causing smears.
After stamping the image onto your card stock, allow ample time for the ink to dry. Using waterproof ink, you now have the option of using blender pens without smearing the stamping ink. Apply the pencil to the area you want to color. Begin by applying a small amount of color at first, until you are familiar with each color and how intensely it applies. Less is best. You can always apply more color later. Apply the color to the center of flowers, or along the edge of the stamped image making sure not to leave any white space between the image and the color you are applying.
WHAT ABOUT SHADING?
There are two shading options when using the pastels. Apply the color, first, to the shaded areas of the image and then blend the color out to a lighter value. In other words, you are doing your shading first, then blending the color out with the cotton swab; therefore your color will lighten as you move across the image. (Use an INEXPENSIVE brand of swabs so the head does not open up too easily, like with the Q-tip brand.) Avoid over-blending; a very common mistake. You want to create a shaded look and over- blending will just make the entire chalked area look all the same. If you do over blend, you can always add more color to the shading areas to create that contrast again. Blend the color with the cotton swab, making tiny circles as you blend the color out. Circles seem to blend the color more evenly as you move within the stamped area. Once that area is colored and shaded, you can leave it alone, add more of the same color, or add another color to create a deeper shade. As you become more familiar with your palette of colors, you will be able to do that with ease. Again, be careful NOT to over-blend.
A second option for shading is to color in the entire area with the pencil. Even out the color with the swab and blow off the excess chalk dust. Since the pencil colors are opaque and may obscure some of the ink detail, it may be necessary to erase some of the chalk with your eraser (e.g. facial features on the House Mouse). Next, apply a darker color to the areas you want shaded. Blend that second color with a much lighter hand. Avoid the temptation to over-blend. Sometimes, just touching the second color with the swab to remove the chalk dust is enough. Occasionally, it takes a little more blending. But do not over do it, or you will homogenize the color and have to start over. If some of the colors are too intense, you can always use the white pencil to mute the shade. Color white pencil over the top of your other color to lighten it, and then blend.
Many stamps have shading detail already drawn into the design. They may be tiny dots or lines to show where the artist would shade the design when coloring. Follow those guidelines for your shading. If they are not included, shade each area of the design, however large or small, being careful not to cover up the base color with your new shading color. The shading can be on the right or left or both as you work on the design, but avoid the tendency to over-shade, remembering not to cover up your base color with your shade color. Stop to evaluate your work and then add more color if needed. When two parts of a design touch each other, (e.g. a bodice and sleeve of a dress), shade both areas making sure the shading touches each other. Shade everything you can to make the image look completely dimensional. Even something as small as the center of a small flower is important. You can also use the color of the paper to create the lightest value. An example of this is a flower. Base-color the petal but do not fill in entirely. Leave some of the paper color showing on the petal to create that lightest value. Your goal is to have a light, a medium, and then a dark value of shading. Sometimes that is achieved with one color and sometimes it is achieved using more than one color.
CAN I USE A BLENDER PEN?
Dove or Tombow blender pens are another option for coloring with the pastel pencils. Start with a clean pen tip, using a Kleenex to wipe the tip until the fluid comes out clear. Make sure the tip is always clean before changing to another color. Use the tip of the clean blender pen to pick up the color from the pencil and then apply the color to the paper. Care must be taken when applying the color to the paper. Excessive rubbing will cause the paper to tear. Use the side of the blender pen tip, with a light hand to avoid excessive rubbing. If you need to apply more color or a second color, make sure that the area is thoroughly dry beforehand. Wet application of the pen to wet paper spells trouble.
HOW DO I FINISH THE PROJECT?
Make sure that when you are completely finished, you erase all chalk smudges thoroughly with the Tuff Stuff Eraser Stick (or any white eraser), being careful not to smudge any further. Since the blender pen seals the chalk color into the paper, there is no need to seal the image with acrylic spray. If you only use swabs to blend your pencils, you must seal your work with a matte acrylic sealer, to avoid smudges. Do not use hairspray. The lacquer in the hairspray will bleed the pigment in the chalk. A very light coat of matte sealer will finish the work. After that is dry, a second and third light coat may be applied. Don’t spray the paper too closely or it will smear and bleed the color. Be careful not to saturate the paper with the spray.
The Bruynzeel pencil sharpener is highly recommended for the pastel pencils. Use caution when sharpening so the lead is not broken. The color slot on the sharpener is for soft lead pencils such as the pastels; the normal slot is for hard lead pencils such as watercolor.
IN CONCLUSION
Practice will help a great deal when working with pastel pencils. Remember that they are chalk-based and the color is very intense. Get to know your colors to become familiar with how they blend. Also remember, it is only paper! If you don’t like the result, don’t give up. Keep practicing and look at others’ work to see how they do their shading and what colors they use.
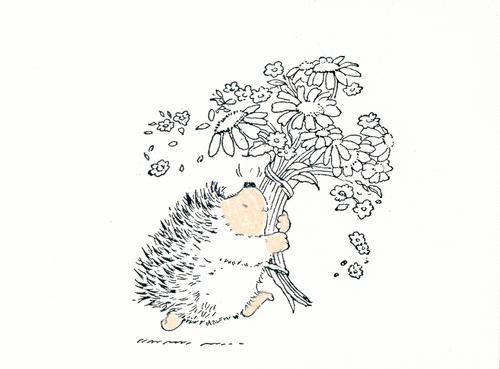
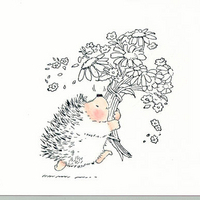
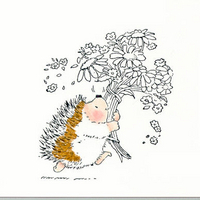
STEP 1
Beckett Expression Iceberg Cardstock
Marvy Matchables Black Ink
Bruynzeel Pastel Pencils
This is a Penny Black Hedgehog design. Base color the face, feet and hands with Bruynzeel 875