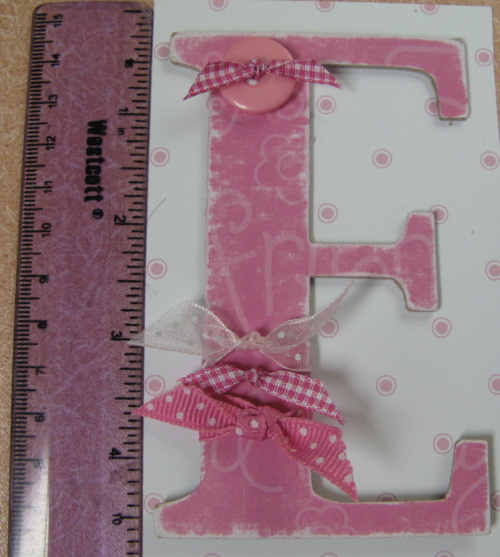
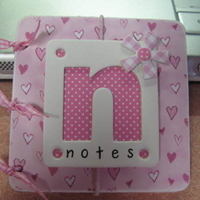
#2495 This is a letter cut out, using chipboard and the CRICUT and Base Camp
4.5" set at REAL DIAL SIZE.
HERE ARE INSTRUCTIONS:
Use .030 weight chipboard
Cut the chipboard piece to 6”x12” to fit your mat
Set your blade depth to 6
Set the speed to the slowest setting
Set the blade pressure to the highest setting.
Tape down the edges of the chipboard onto the cutting mat, to keep it secure when cutting. Load the paper. Set the letter selection and size. Be sure to explore the “Real Dial Size” settings if you want the letter to be the ACTUAL size you desire. Each cartridge has its own specific settings according to the manufacturer’s layout of the cartridge. If the letter is small enough to fit the chipboard, you can cut a quantity of 2 letters at the same time. Two or more chipboard letters can be cut and glued together for a thicker look.
Press “Cut”. When the letter is finished, press “load paper” again. DO NOT press “unload paper”. Next, press “repeat last”. Then press “Cut” again. This will duplicate the same letter cut the first time. Press “load paper” again, then “repeat last” again, then “Cut” again. Do this a total of 3-5 times, depending on the sharpness of your blade and the thickness of your chipboard. Lastly, press “unload paper” and remove the cut letter. Sometimes excess fibers are attached. Just cut these with scissors or sand off with sand paper. A separate letter cut from scrapbook paper can be cut the same size as the chipboard letter and attached easily, to the chipboard, then decorated.
Use glue stick or Xyron glue to adhere the layers together. Burnish the layers of chipboard and paper to each other with a folding bone, pressing firmly to adhere them all securely. Sand the edges of the letter if desired and decorate.
|