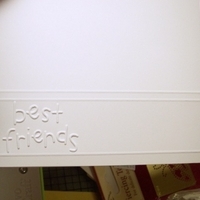
#2891 I have been getting a lot of inquiries about the Lasting Impressions Pre-embossed foldover notes, asking if they were done with the Cuttlebug Swiss Dots Folder.
Those are not, but look what I came up with this morning.
This is interesting.
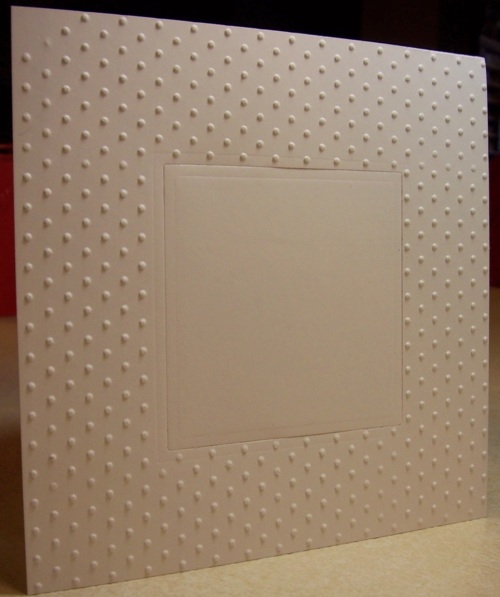
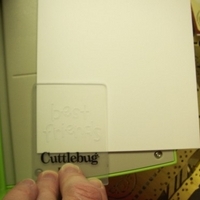
I used a 5.5" square single layer CS, embossed the square frame Nestabilities die in the middle (well sort of the middle...) of the card so that it does not cut through the paper (that is another procedure, linked below), then used the swiss dots folder to emboss dots AROUND that center square. I aligned the dots, embossed and then re-aligned them to complete the design all around the middle square. It will take some more aligning and some more figuring, but this is entirely possible.
ALSO NOTE:
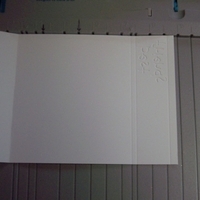
1. With the overlap, some of the dots get squished, so turn the embossed cardstock over, lay it on top of a mousepad or a coaster and use a ball tipped embossing tool and GENTLY push the dots back out. (Sharon Johnson*s idea!)
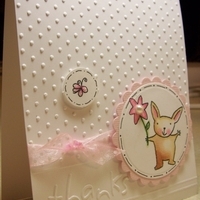
What do you think? Until someone comes up with an embossing folder, this might work. Let me know if you try this.
This is my first try and needs perfecting, and you will also notice the square in the middle is partially cut...I did not have the die shimmed well enough to prevent that. Will do better next time.
Here is the tutorial on how to make an embossed frame with the Nestabilities.
http://nicholeheady.typepad.com/capture_the_moment/2007/07/5-1.html
Scroll down a little bit.
After this is completed, adhere that to a folded card and noone will ever know you did it yourself! |